本系列教程的開發環境及開發語言:
Angular 4 +
Angular CLI
TypeScript
基礎知識
Angular CLI 基本使用
安裝 Angular CLI (可選)
npm install -g @angular/cli
創建新的項目
ng new PROJECT-NAME
啟動本地服務器
cd PROJECT-NAME ng serve
Angular 指令簡介
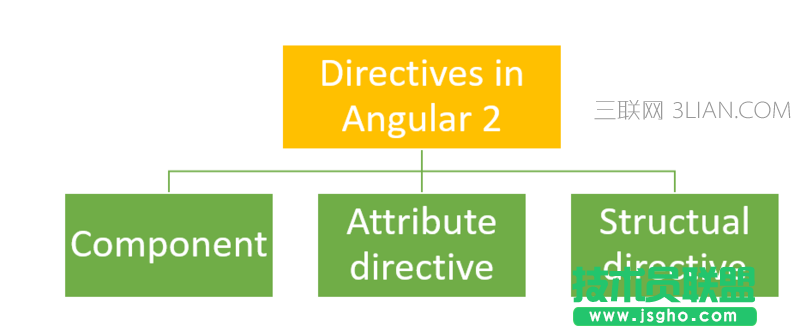
Angular 的指令分為三種:
組件(Component directive):用于構建UI組件,繼承于 Directive 類
屬性指令(Attribute directive):用于改變組件的外觀或行為
結構指令(Structural directive):用于動態添加或刪除 DOM 元素來改變 DOM 布局
Angular 指令分類圖
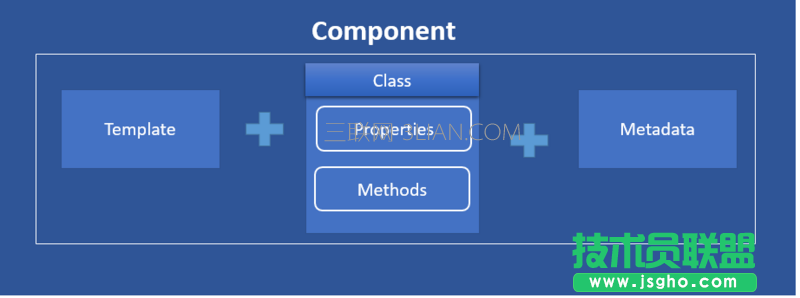
Angular 組件組成圖
第一節 - 創建指令
在 Angular 中,我們可以使用 HostBinding 裝飾器,實現元素的屬性綁定。
指令的作用
該指令用于演示如何利用 HostBinding 裝飾器,設置元素的 innerText 屬性。
指令的實現
import { Directive, HostBinding} from '@angular/core'; @Directive({ selector: '[greet]' }) export class GreetDirective { @HostBinding() innerText = 'Hello, Everyone!'; } 指令的應用 import { Component } from '@angular/core'; @Component({ selector: 'app-root', template: ` <h2>Hello, Angular</h2> <h2 greet>Hello, Angular</h2> `, }) export class AppComponent { }
第二節 - 定義輸入屬性
為了能夠讓用戶自定義 GreetDirective 指令的問候內容,我們需要使用 Input 裝飾器去定義指令的輸入屬性。
指令的作用
該指令用于演示如何利用 Input 裝飾器,定義指令的輸入屬性,從而實現讓用戶自定義問候內容。
指令的實現
import { Directive, HostBinding, Input } from '@angular/core'; @Directive({ selector: '[greet]' }) export class GreetDirective { @Input() greet: string; @HostBinding() get innerText() { return this.greet; } }
指令的應用
import { Component } from '@angular/core'; @Component({ selector: 'app-root', template: ` <h2>Hello, Angular</h2> <h2 [greet]="'Hello, Semlinker!'">Hello, Angular</h2> `, }) export class AppComponent { }
第三節 - 事件處理
在 Angular 中,我們可以使用 HostListener 屬性裝飾器,實現元素的事件綁定。
指令的作用
該指令用于演示如何利用 HostListener 裝飾器,監聽用戶的點擊事件。
指令的實現
import { Directive, HostBinding, HostListener, Input } from '@angular/core'; @Directive({ selector: '[greet]' }) export class GreetDirective { @Input() greet: string; @HostBinding() get innerText() { return this.greet; } @HostListener('click',['$event']) onClick(event) { this.greet = 'Clicked!'; } }
指令的應用
import { Component } from '@angular/core'; @Component({ selector: 'app-root', template: ` <h2>Hello, Angular</h2> <h2 [greet]="'Hello, Semlinker!'">Hello, Angular</h2> `, }) export class AppComponent { }
第四節 - 獲取宿主元素屬性值
在 Angular 中,我們可以通過 Attribute 裝飾器來獲取指令宿主元素的屬性值。
指令的作用
該指令用于演示如何利用 Attribute 裝飾器,獲取指令宿主元素上的自定義屬性 author 的值。
指令的實現
import { Directive, HostBinding, HostListener, Input, Attribute } from '@angular/core'; @Directive({ selector: '[greet]' }) export class GreetDirective { @Input() greet: string; @HostBinding() get innerText() { return this.greet; } @HostListener('click',['$event']) onClick(event) { this.greet = 'Clicked!'; console.dir(event); } constructor(@Attribute('author') public author: string) { console.log(author); } }
指令的應用
import { Component } from '@angular/core'; @Component({ selector: 'app-root', template: ` <h2>Hello, Angular</h2> <h2 [greet]="'Hello, Semlinker!'" author="semlinker">Hello, Angular</h2> `, }) export class AppComponent { }
第五節 - 使用 <ng-template> 元素
在 Angular 中,我們可以通過 ViewChild 裝飾器來獲取視圖中定義的模板元素,然后利用 ViewContainerRef 對象的 createEmbeddedView() 方法,創建內嵌視圖。